
AWS – Develop ETL jobs using AWS Glue Endpoints

AWS Glue scripts can have start up times that could be as long as 12 minutes especially if you are developing Streaming Jobs which Glue 2.0 still doesn’t support. Therefore, it is very important to understand how to setup and use Development Endpoints in AWS Glue so that you can develop and unit test your code in a Jupyter Notebook, Zeppelin Notebook or REPL before deploying the code to your Glue job.
Caution: AWS Glue is expensive and so is using development endpoints. But development endpoints are a necessary evil. Just make sure that you delete the endpoint when you wrap up your day. When you start again, follow the steps again to create a fresh endpoint. You can reuse the key pairs every day. The process of deleting and re-creating an endpoint may seem cumbersome at first but will soon become habitual and save you precious rupees.
Let’s jump right in!
Step 1: Click “Dev endpoints” on the left menu and then click “Add Endpoint”

Step 2: Create an IAM role for AWS Glue that has access to your datastores. This is needed so that your endpoints can access your data stores. You can use the same role for the final Glue job.
More details here – https://docs.aws.amazon.com/glue/latest/dg/create-an-iam-role.html?icmpid=docs_glue_console
Step 3: Give an intuitive name to your endpoint
Remember that you cannot “pip install” libraries in Glue. If you want to use any external libraries, upload them to an S3 bucket and provide the path under Python library path. Multiple libraries can be specified using a comma delimited string. In this eg., I’ve imported the pg8000 library used to connect to Postgres databases.
Specify the number of DPUs. The lower, the cheaper and the minimum you can go down to is 2.
Select the IAM role you created in Step 2 from the dropdown
The rest are standard and can be left default. Click NEXT

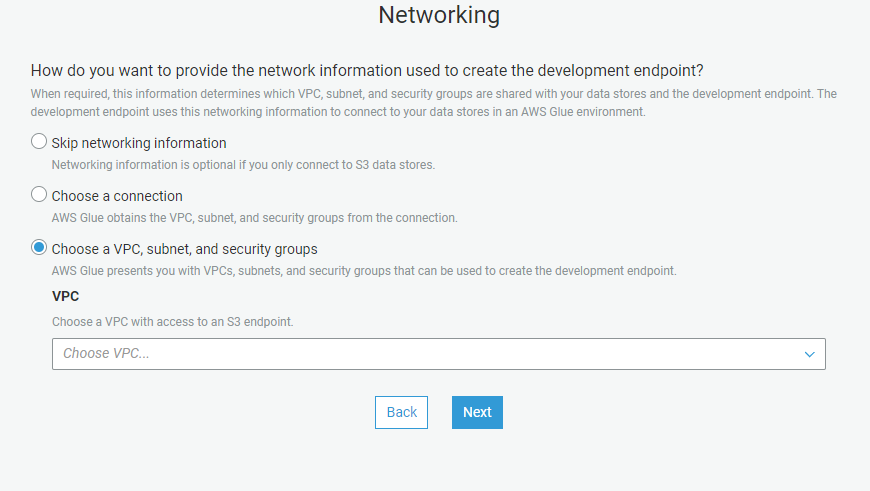
Step 3: Choose networking options as necessary. Typically, in a corporate setting, you’d want to choose the VPC if one is available
Step 4: Generate a Public/Private SSH Key pair so that you can tunnel into the endpoint from your machine
This can be done using PuTTYgen.
- Open PuTTYgen and click on generate public/private key pair.
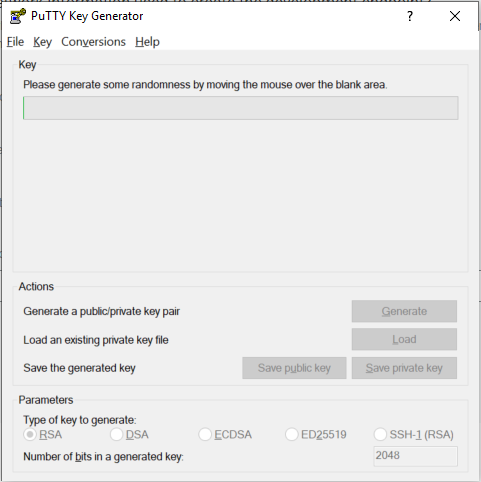
2. Copy the Public Key that gets generated and save it for future connections. Also save the private key file.
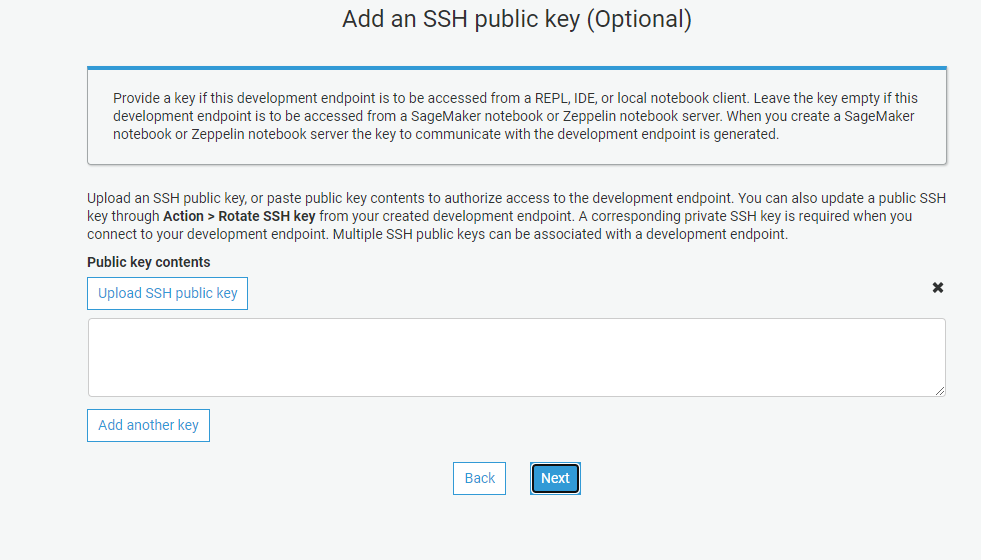
Step 5: Upload SSH Key
Paste the public key from Step 4 into this box. Leave it EMPTY if you want to connect a Notebook server. I prefer using a local notebook since a notebook server would mean an added EC2 instance. Click NEXT
Step 6: Review the information on the final screen and click “FINISH”.
The endpoint may take anywhere between 8-10 minutes to get created. So grab a coffee and then move to Step 7
Step 7: Make sure you have Jupyter Labs or Jupyter Notebook installed
You can also use Zeppelin in a containerized environment. I am only going to go through Jupyter in this post.
Step 8: Open a command window or a powershell window as an administrator and create an SSH tunnel.
When the endpoint is created, SSH commands to tunnel into different environments will be provided. For some reason, the Jupyter port details aren’t provided on the endpoint page. The command to tunnel into the Jupyter endpoint is:
ssh -i pvt-glue-dev-endpoint-key.pem -NTL :8998:169.254.76.1:8998 glue@ip-address-of-the-endpoint
Other than the IP address of the endpoint, everything else will remain much the same. pvt-glue-dev-endpoint-key.pem is the private key file that you saved in step 4. The Jupyter endpoint is hosted on port 8998 and that’s the port you will be tunnelling into.
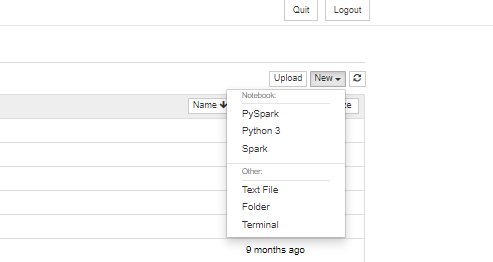
Step 9: Open a Jupyter Notebook and Click on NEW PySpark or Spark notebook
When you initialize the Spark Context, the notebook will automatically tunnel into your endpoint and connect to the Spark Kernel that your Glue jobs run on.
REMEMBER to delete your ENDPOINT when you wrap up your day. Don’t tell me I didn’t warn you!
[…] Developing AWS Glue Scripts Using Dev Endpoints […]